Embark on a journey to master the art of cheesemaking, starting with the unsung hero: sanitation. This guide, “How to Properly Sanitize Your Cheesemaking Equipment,” will transform your cheesemaking experience from a hopeful endeavor into a consistent producer of delicious and safe cheeses. Imagine crafting artisan cheeses, free from unwanted flavors and potential health risks. Proper sanitation is the cornerstone of this success, guaranteeing that your creations are not only delectable but also safe for consumption.
We’ll explore the crucial differences between cleaning and sanitizing, dissecting the tools and techniques needed to eliminate harmful microorganisms. From cheese vats and molds to your humble utensils, we’ll provide step-by-step procedures and insightful tips to ensure your equipment is sparkling clean and ready for action. This will cover everything from choosing the right sanitizers to establishing effective sanitization schedules for both home and commercial settings.
Let’s dive in!
The Importance of Sanitization in Cheesemaking
Proper sanitization is the cornerstone of successful cheesemaking. Neglecting this crucial step can lead to disastrous outcomes, ranging from spoiled cheese to potential health hazards. By understanding the risks and implementing effective sanitization practices, you can ensure the safety and quality of your homemade cheeses.Sanitization in cheesemaking is not just about cleanliness; it’s about eliminating microorganisms that can spoil your product or pose health risks.
These microorganisms, including bacteria, yeasts, and molds, thrive in the moist environment of cheesemaking and can quickly multiply if given the chance.
Consequences of Improper Sanitization
The consequences of poor sanitation in cheesemaking are varied and can significantly impact your final product and your health.
- Spoiled Cheese: This is the most common outcome. Contamination can lead to off-flavors, textures, and appearances. For example, Pseudomonas bacteria can cause a slimy texture and bitter taste in cheese. Mold growth, such as the blue or green molds, can ruin the cheese aesthetically and affect its flavor profile, as they produce undesirable metabolites.
- Foodborne Illness: More seriously, improper sanitization can introduce harmful pathogens, such as Listeria monocytogenes, Salmonella, or E. coli, which can cause serious illness. These pathogens can contaminate milk and cheese during the cheesemaking process if equipment is not properly cleaned and sanitized. Symptoms can range from mild gastrointestinal distress to severe infections.
- Flavor and Texture Defects: Even if the cheese isn’t outright spoiled, contamination can affect its flavor and texture. Undesirable bacteria can produce off-flavors, such as bitterness or sourness, and can alter the texture, leading to a rubbery, crumbly, or otherwise unappealing product. For example, the growth of butyric acid bacteria can result in a “swollen” cheese with a rancid flavor.
Equipment Requiring Sanitization
Sanitizing all equipment that comes into contact with milk or cheese is essential. This includes items that appear clean to the naked eye.
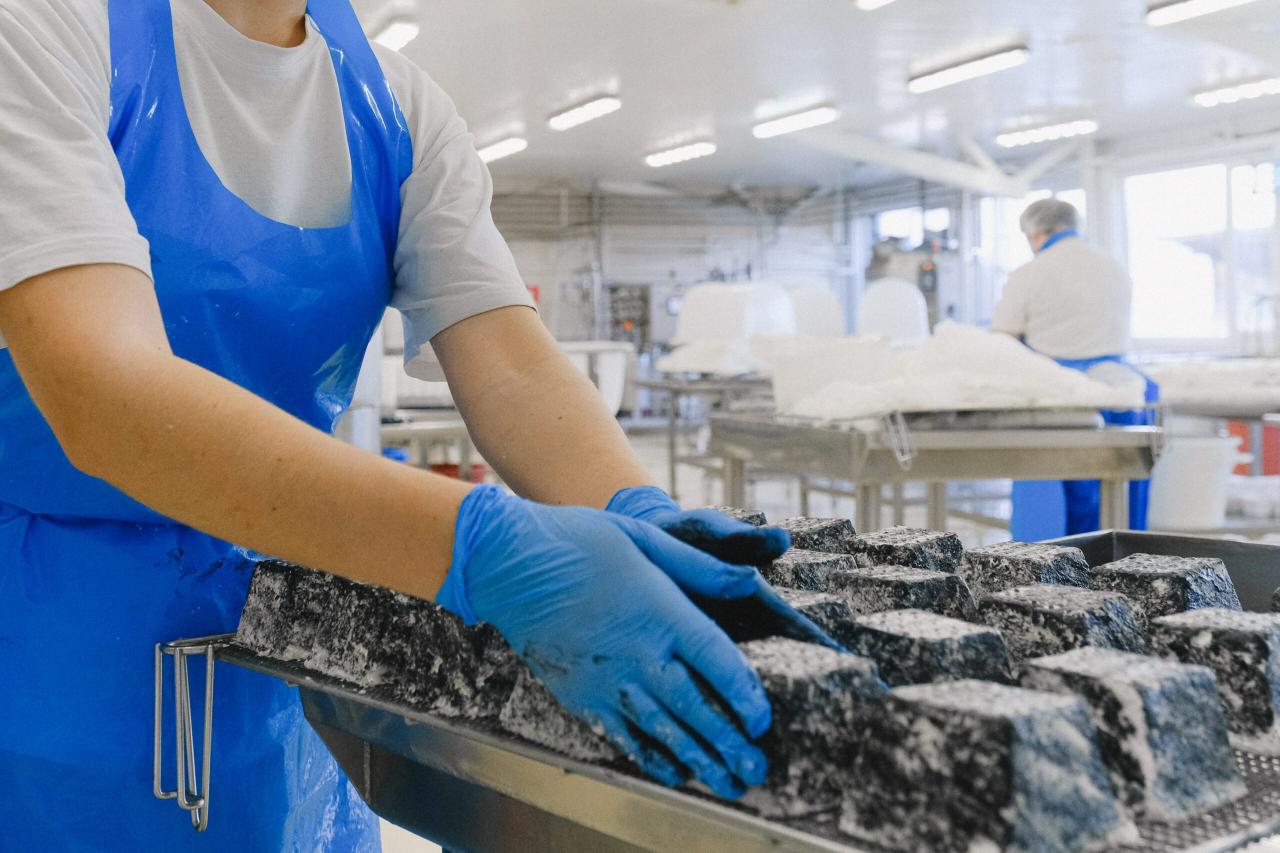
- Cheese Vats and Containers: These are the primary vessels for holding milk and cheese. They must be thoroughly cleaned and sanitized to prevent the buildup of bacteria and other microorganisms.
- Cheese Molds: Cheese molds provide shape to the cheese. They often have intricate designs that can trap bacteria.
- Utensils: This includes ladles, stirring spoons, knives, and any other tools that come into contact with the milk or cheese. These items can easily transfer contaminants if not sanitized.
- Cutting Boards and Surfaces: Surfaces where cheese is cut, handled, or stored must be sanitized to prevent cross-contamination.
- Cheesecloth and Other Filtration Materials: These porous materials can harbor bacteria and require special attention during sanitization.
Impact on Cheese Quality
Proper sanitization has a direct and significant impact on the final quality of your cheese.
- Flavor Development: By controlling the microbial environment, you can guide the desired flavor development. Sanitization helps prevent unwanted bacteria from interfering with the specific cultures used to make the cheese.
- Texture and Appearance: Sanitization prevents unwanted bacteria from changing the texture and appearance of the cheese. This contributes to the formation of a desirable and consistent product.
- Shelf Life: Sanitized equipment reduces the risk of spoilage, thus extending the shelf life of your cheese. Proper sanitization is one of the key factors in achieving a longer shelf life, which is essential for both home cheesemakers and commercial producers.
- Safety: Most importantly, sanitization eliminates harmful pathogens, ensuring that the cheese is safe for consumption. This protects consumers from potential health risks.
Understanding the Difference Between Cleaning and Sanitizing

Cleaning and sanitizing are two distinct but equally crucial steps in cheesemaking. While often used together, they address different aspects of hygiene and contamination control. Understanding the difference between these two processes is fundamental to producing safe and high-quality cheese.
The Cleaning Process
Cleaning is the first step in preparing your cheesemaking equipment for use. It involves removing visible dirt, food particles, and other debris that can harbor microorganisms and interfere with the sanitizing process. This is achieved through the use of cleaning agents and physical scrubbing.The goal of cleaning is to remove all visible contaminants. This prepares the surface for sanitization. Here are some commonly used cleaning agents:
- Detergents: These are general-purpose cleaners designed to lift dirt and grease from surfaces. They work by emulsifying fats and oils, allowing them to be rinsed away with water. They are suitable for most surfaces.
- Alkaline Cleaners: These cleaners are effective at removing protein-based soils, such as milk residue. They are often used in cheesemaking equipment and are particularly effective in hard water conditions.
- Acid Cleaners: These are used to remove mineral deposits, such as milkstone (a buildup of calcium and protein). They can also help to prevent the formation of biofilms.
The Sanitizing Process
Sanitizing is the process of reducing the number of microorganisms on a surface to a safe level. This is the second crucial step, following cleaning. It aims to eliminate or significantly reduce the presence of bacteria, yeasts, molds, and other potential spoilage organisms that could contaminate your cheese.The goal of sanitizing is to kill or inactivate the microorganisms that remain after cleaning.
Here are some common sanitizing agents used in cheesemaking:
- Chlorine-based sanitizers: These are effective and relatively inexpensive. They are readily available and work well against a broad spectrum of microorganisms. However, they can corrode certain metals and may leave a residual chlorine taste if not rinsed thoroughly.
- Iodophors: These are iodine-based sanitizers. They are effective and have a longer residual effect than chlorine-based sanitizers. They also provide a visual indicator of their effectiveness (they change color when diluted).
- Quaternary Ammonium Compounds (Quats): These are non-corrosive and odorless sanitizers. They are effective against a wide range of microorganisms and are often used in food processing. However, they can be inactivated by hard water and certain organic matter.
Comparing and Contrasting Cleaning and Sanitizing
Cleaning and sanitizing are interdependent processes. Cleaning removes the bulk of the organic matter, making sanitizing more effective. Sanitizing, on the other hand, cannot effectively eliminate microorganisms if the surface is not first cleaned.Here’s a comparison:
| Process | Goal | Action | Agent Type |
|---|---|---|---|
| Cleaning | Remove visible dirt and debris | Washing with detergent and water, scrubbing | Detergents, alkaline cleaners, acid cleaners |
| Sanitizing | Reduce the number of microorganisms to a safe level | Applying a sanitizer | Chlorine-based, iodophors, quats |
Remember, cleaning is about removing visible dirt, while sanitizing is about killing unseen microorganisms. Both are essential for safe cheesemaking.
Preparing Equipment for Sanitization
Before you can effectively sanitize your cheesemaking equipment, you must first prepare it. This crucial step, often overlooked, ensures that sanitization is truly effective. Pre-cleaning removes organic matter, such as milk solids and cheese curds, that can harbor bacteria and prevent the sanitizer from reaching the equipment’s surfaces. Skipping this step renders sanitization largely useless, so let’s delve into the essential pre-cleaning procedures.
Essential Steps for Pre-Cleaning Cheesemaking Equipment
The pre-cleaning process involves several key steps, each playing a vital role in removing contaminants. This ensures the sanitizing solution can effectively work on a clean surface.
The primary steps are:
- Scraping: This initial step removes any large pieces of cheese, curd, or milk solids from the equipment’s surfaces.
- Rinsing: Rinsing with warm water helps to remove loose debris and pre-dissolve any remaining milk solids, preparing the surfaces for washing.
- Washing: Washing involves using a cleaning agent and physical action to remove any remaining organic matter and prepare the equipment for sanitization.
Suitable Cleaning Tools for Cheesemaking Equipment
Choosing the right cleaning tools is as important as the cleaning agent itself. The selection depends on the equipment type and the material it’s made of. Using inappropriate tools can damage the equipment or leave behind residues that hinder sanitization.
Here are some suitable tools:
- Brushes: Stiff-bristled brushes are excellent for scrubbing vats, molds, and other equipment. Soft-bristled brushes are suitable for delicate surfaces.
- Sponges: Sponges, preferably non-abrasive, are useful for cleaning smaller items and reaching into crevices.
- Scrapers: Rubber or plastic scrapers are essential for removing stubborn residue from flat surfaces without scratching them.
- Bottle brushes: Bottle brushes, specifically designed for cleaning bottles and narrow-necked containers, are a must-have.
- Cleaning cloths: Microfiber cloths are effective for wiping down surfaces and removing any lingering moisture after cleaning.
Step-by-Step Procedure for Pre-Cleaning a Cheese Vat
Pre-cleaning a cheese vat requires a systematic approach to ensure thorough cleaning. Here’s a detailed procedure, including specific cleaning agents, to guide you through the process.
Here’s a step-by-step procedure:
- Rinse: Immediately after draining the whey or cheese, rinse the vat with warm water (approximately 100-120°F or 38-49°C). This removes the bulk of the cheese solids.
- Scrape: Use a plastic or rubber scraper to remove any remaining cheese curds or residue from the vat walls, bottom, and corners. Pay special attention to areas where cheese may have stuck.
- Wash: Prepare a cleaning solution. Typically, this involves using a food-grade, alkaline detergent diluted according to the manufacturer’s instructions. Fill the vat with warm water and add the detergent. The temperature should be as specified on the detergent’s label.
- Scrub: Use a long-handled brush to scrub the entire interior surface of the vat, paying close attention to any areas with stubborn residue. Ensure you reach all corners and crevices.
- Rinse Again: Thoroughly rinse the vat with warm water to remove all traces of the cleaning solution. Ensure no detergent residue remains, as this can affect the cheese’s flavor and the effectiveness of the sanitizer.
- Inspect: Visually inspect the vat for any remaining residue. If any is found, repeat the washing and rinsing steps.
- Drain and Dry: Allow the vat to drain completely. If possible, allow it to air dry. If drying is not possible immediately, wipe the surface with a clean cloth to prevent water spots.
Example Cleaning Agents:
- Alkaline Detergents: Such as those containing sodium hydroxide (lye) or sodium carbonate (washing soda), are effective at removing protein and fat residues. These are common in dairy cleaning applications.
- Acid-Based Cleaners: These cleaners, often containing phosphoric or citric acid, are used to remove mineral deposits and milkstone.
Always follow the manufacturer’s instructions for the cleaning agent, including dilution ratios, contact times, and safety precautions. Improper use of cleaning agents can damage equipment and pose health risks.
Selecting the Right Sanitizers

Choosing the right sanitizer is crucial for ensuring the safety and quality of your cheese. Different sanitizers have varying strengths and weaknesses, so understanding their properties will help you select the most appropriate option for your cheesemaking equipment and practices. This section will explore the common sanitizer types used in cheesemaking, their characteristics, and how to use them effectively.
Chlorine-Based Sanitizers
Chlorine-based sanitizers are widely used in food processing due to their effectiveness and relatively low cost. They work by oxidizing microorganisms, effectively killing bacteria, viruses, and fungi.
- Advantages: They are readily available, inexpensive, and have a broad spectrum of antimicrobial activity. They also leave little residue when used correctly.
- Disadvantages: Chlorine solutions can be corrosive to some metals, and their effectiveness is reduced by organic matter. They can also produce off-flavors in cheese if not rinsed properly. They also degrade over time and with exposure to light.
- Types: Common forms include sodium hypochlorite (household bleach) and calcium hypochlorite (powdered chlorine).
- Concentration: For sanitizing cheesemaking equipment, a solution of 50-100 ppm (parts per million) of available chlorine is typically recommended. This can be achieved by diluting household bleach (usually 5.25% sodium hypochlorite) with water.
- Contact Time: Allow a contact time of at least 2 minutes for effective sanitization.
- Safety Precautions: Always wear gloves and eye protection when handling chlorine solutions. Ensure adequate ventilation. Never mix chlorine with ammonia or other cleaners, as this can produce toxic gases.
- Impact on Cheese: Properly rinsed equipment should not impart significant flavor changes. However, excessive chlorine exposure can lead to undesirable flavors and inhibit starter cultures.
Iodophors
Iodophors are iodine-based sanitizers complexed with a solubilizing agent, which makes them less corrosive than chlorine and effective against a wide range of microorganisms. They release iodine slowly, providing a sustained sanitizing effect.
- Advantages: They are effective against a broad spectrum of microorganisms, including bacteria, yeasts, and molds. They are less corrosive than chlorine and are effective in the presence of some organic matter. They also have a visual indicator (the solution turns amber when active).
- Disadvantages: Iodophors can stain surfaces and equipment. They are also more expensive than chlorine. Some individuals are allergic to iodine. They can also impart off-flavors if not properly rinsed.
- Types: Iodophors are available in liquid concentrates.
- Concentration: Typically used at a concentration of 12.5 to 25 ppm of available iodine. Follow the manufacturer’s instructions for dilution.
- Contact Time: Allow a contact time of at least 1 minute.
- Safety Precautions: Avoid contact with skin and eyes. Follow the manufacturer’s instructions for dilution and use.
- Impact on Cheese: Proper rinsing is essential to avoid off-flavors. Iodophors are generally considered safe for use in cheesemaking when used as directed.
Quaternary Ammonium Compounds (Quats)
Quaternary ammonium compounds (quats) are cationic surfactants that disrupt the cell membranes of microorganisms. They are effective against a wide range of bacteria and some fungi.
- Advantages: They are odorless, colorless, and non-corrosive. They are also relatively stable and can have a residual sanitizing effect.
- Disadvantages: Quats are less effective against some molds and viruses compared to chlorine or iodophors. They can be inactivated by hard water and organic matter. They also can leave a residue if not properly rinsed.
- Types: These are available in liquid concentrate form.
- Concentration: Typically used at concentrations between 200 and 400 ppm. Always follow the manufacturer’s instructions.
- Contact Time: Allow a contact time of at least 1 minute.
- Safety Precautions: Avoid contact with skin and eyes. Quats can be toxic if ingested. Always follow the manufacturer’s instructions for dilution and use.
- Impact on Cheese: Residue can cause off-flavors if not rinsed adequately. The residual effect can be beneficial for some applications, but may also inhibit desirable bacterial growth.
Sanitizer Comparison Table
This table summarizes the key characteristics of the different sanitizer options discussed.
| Sanitizer Type | Concentration | Contact Time | Advantages | Disadvantages | Safety Precautions |
|---|---|---|---|---|---|
| Chlorine-Based | 50-100 ppm available chlorine | 2 minutes | Inexpensive, broad spectrum | Corrosive, inactivated by organic matter, can impart off-flavors | Wear gloves and eye protection, ensure ventilation, do not mix with ammonia. |
| Iodophors | 12.5-25 ppm available iodine | 1 minute | Effective against a broad spectrum, less corrosive than chlorine, visual indicator | Can stain, more expensive, can impart off-flavors | Avoid contact with skin and eyes, follow manufacturer’s instructions. |
| Quaternary Ammonium Compounds (Quats) | 200-400 ppm | 1 minute | Odorless, colorless, non-corrosive, residual effect | Less effective against some molds and viruses, inactivated by hard water and organic matter, can leave residue | Avoid contact with skin and eyes, follow manufacturer’s instructions. |
Sanitization Procedures for Common Cheesemaking Equipment
Now that you understand the importance of sanitization and the various sanitizers available, let’s dive into the practical steps for sanitizing your cheesemaking equipment. Proper sanitization is crucial to eliminate unwanted microorganisms and ensure the safety and quality of your cheese. We’ll cover the sanitization procedures for key pieces of equipment, from large vats to small utensils.
Sanitizing the Cheese Vat
The cheese vat is the heart of your cheesemaking operation, so keeping it meticulously clean and sanitized is essential. Neglecting this step can lead to significant spoilage and potential health hazards.Here’s a detailed procedure for sanitizing a cheese vat:
- Rinse and Clean: After each use, thoroughly rinse the vat with warm water to remove any residual milk or cheese particles. Then, wash the vat with a food-grade detergent and hot water. Scrub all surfaces, paying close attention to corners and crevices where bacteria can hide. Rinse thoroughly to remove all traces of detergent.
- Prepare the Sanitizer Solution: Select a sanitizer appropriate for your vat material (stainless steel, plastic, etc.). Follow the manufacturer’s instructions for dilution. For example, a common sanitizer like chlorine bleach (sodium hypochlorite) might require a concentration of 50-100 ppm (parts per million) for food contact surfaces. Use a test strip to verify the concentration, ensuring accuracy.
- Apply the Sanitizer: Apply the sanitizer solution to all surfaces of the vat, ensuring complete coverage. This can be done by spraying, wiping, or filling the vat with the solution. Make sure the sanitizer reaches every nook and cranny.
- Contact Time: Allow the sanitizer to remain in contact with the vat surfaces for the recommended contact time, typically 1-2 minutes for chlorine-based sanitizers or as specified by the manufacturer. Adhering to the contact time is crucial for effective sanitization.
- Rinse (If Required): Some sanitizers, like quaternary ammonium compounds, may not require rinsing if used at the correct concentration. However, chlorine-based sanitizers usually require rinsing. Rinse the vat thoroughly with potable water after the contact time. Ensure all traces of the sanitizer are removed, as residual sanitizer can affect the cheese’s flavor and potentially pose a health risk.
- Air Dry: Allow the vat to air dry completely before using it again. This prevents recontamination and ensures the sanitizer is fully effective.
Important Note: Always refer to the manufacturer’s instructions for your specific sanitizer, as concentrations and contact times can vary.
Sanitizing Cheese Molds
Cheese molds are in direct contact with the cheese curd, making their sanitization critically important. Proper sanitization prevents the growth of unwanted molds and bacteria, which can spoil the cheese and impact its flavor and texture.Here’s a guide to sanitizing your cheese molds:
- Pre-Cleaning: After each use, rinse the molds with warm water to remove any cheese residue. Use a brush to scrub away any stuck-on curds.
- Cleaning: Wash the molds with hot, soapy water, using a food-grade detergent. Pay close attention to all surfaces, including any crevices or intricate designs. Rinse thoroughly to remove all traces of detergent.
- Sanitizer Selection and Preparation: Choose a sanitizer suitable for the mold material (plastic, stainless steel, etc.). Prepare the sanitizer solution according to the manufacturer’s instructions. A common choice is a diluted chlorine solution.
- Sanitizing Procedure:
- Immersion: Completely submerge the molds in the sanitizer solution, ensuring all surfaces are in contact with the sanitizer.
- Spraying: If immersion is not practical, spray the molds thoroughly with the sanitizer solution, ensuring complete coverage. Use a spray bottle and reach all areas, inside and out.
- Contact Time: Allow the sanitizer to remain in contact with the molds for the recommended time, typically 1-2 minutes for chlorine solutions.
- Rinsing: Rinse the molds thoroughly with potable water to remove any residual sanitizer.
- Drying: Allow the molds to air dry completely before use. This prevents the growth of any remaining microorganisms.
- Storage: Store sanitized molds in a clean, dry place to prevent recontamination.
Sanitizing Smaller Utensils
Ladles, spoons, knives, and other small utensils used in cheesemaking can easily harbor bacteria and molds. Thorough sanitization of these items is critical to preventing contamination of the cheese.Here’s a step-by-step approach to sanitizing smaller utensils:
- Rinse and Clean: Immediately after use, rinse the utensils with warm water to remove any cheese residue. Wash them thoroughly with hot, soapy water and a food-grade detergent. Pay close attention to all surfaces, including the handles and any crevices. Rinse thoroughly to remove all traces of detergent.
- Sanitizer Selection: Select a suitable sanitizer. Chlorine-based sanitizers or iodophors are often used.
- Sanitizing Procedures:
- Immersion: Submerge the utensils in the prepared sanitizer solution, ensuring complete coverage.
- Spraying: If immersion is not feasible, spray the utensils thoroughly with the sanitizer solution.
- Contact Time: Allow the sanitizer to remain in contact with the utensils for the recommended time, usually 1-2 minutes.
- Rinsing (if required): Rinse the utensils thoroughly with potable water if the sanitizer requires it.
- Drying and Storage: Allow the utensils to air dry completely. Store the sanitized utensils in a clean, covered container or rack to prevent recontamination.
Sanitization Techniques for Various Cheesemaking Environments
Sanitization protocols differ significantly depending on the cheesemaking environment. Home cheesemakers face different challenges than commercial facilities, and cheese caves require specific attention. Understanding these nuances is crucial for effective sanitation and consistent, safe cheese production.
Sanitation Protocols for a Home Cheesemaking Setup
Home cheesemakers often operate with limited space and equipment. Efficient sanitation in this context prioritizes simplicity, cost-effectiveness, and adaptability.
- Equipment Selection and Preparation: Focus on easily cleaned and sanitized equipment. Stainless steel pots, utensils, and molds are ideal. Before each cheesemaking session, thoroughly clean all equipment with hot, soapy water. Rinse well to remove any soap residue.
- Sanitizer Choice and Application: Choose a food-grade sanitizer like a diluted bleach solution (50-100 ppm), a commercially available sanitizer like Star San, or a no-rinse sanitizer. Follow the manufacturer’s instructions for dilution and contact time. Ensure all surfaces come into contact with the sanitizer. For example, immerse smaller items like ladles and molds in a sanitizing solution.
- Workspace Management: Keep the cheesemaking area clean and organized. Wipe down countertops and surfaces before starting and frequently throughout the process. Prevent cross-contamination by designating specific areas for different tasks.
- Post-Production Cleaning: Immediately after cheesemaking, thoroughly clean and sanitize all equipment. This prevents the build-up of bacteria and mold. Air-dry equipment completely before storage.
- Storage Considerations: Store sanitized equipment in a clean, dry place, away from potential contaminants. Cover equipment to prevent dust accumulation. Consider using designated containers for storage.
Sanitation Procedures Required for a Commercial Cheesemaking Facility
Commercial cheesemaking facilities operate under stringent regulatory requirements. They often employ automated systems and sophisticated sanitation protocols to ensure product safety and consistency.
- Compliance with Regulations: Commercial cheesemakers must adhere to all relevant food safety regulations, such as those set by the FDA in the United States or equivalent bodies in other countries. This includes maintaining detailed sanitation records and implementing a Hazard Analysis and Critical Control Points (HACCP) plan.
- Automated Cleaning and Sanitizing Systems: Facilities often utilize automated Clean-in-Place (CIP) systems for tanks, pipes, and other equipment. These systems circulate cleaning and sanitizing solutions without the need for disassembly. CIP systems use a series of steps: pre-rinse, cleaning with alkaline detergent, intermediate rinse, sanitizing with chemicals, and a final rinse.
- Equipment Design and Material Selection: Equipment is typically constructed from stainless steel and designed for easy cleaning and sanitization. Surfaces are smooth and non-porous to prevent bacteria buildup.
- Personnel Training and Hygiene: Employees receive comprehensive training on sanitation procedures and personal hygiene. This includes proper handwashing techniques, the use of protective clothing, and procedures to prevent cross-contamination. Regular audits ensure adherence to sanitation protocols.
- Environmental Monitoring: Commercial facilities often monitor the environment for bacteria and mold. This may involve air sampling and surface testing. Data is recorded and analyzed to identify and address potential sanitation issues.
- Sanitizer Selection and Usage: Commercial facilities may use a wider range of sanitizers, including chlorine-based sanitizers, quaternary ammonium compounds, and peracetic acid. The choice of sanitizer depends on the equipment, the specific cheese being made, and regulatory requirements. Sanitizers are used at specified concentrations and contact times, monitored to ensure efficacy.
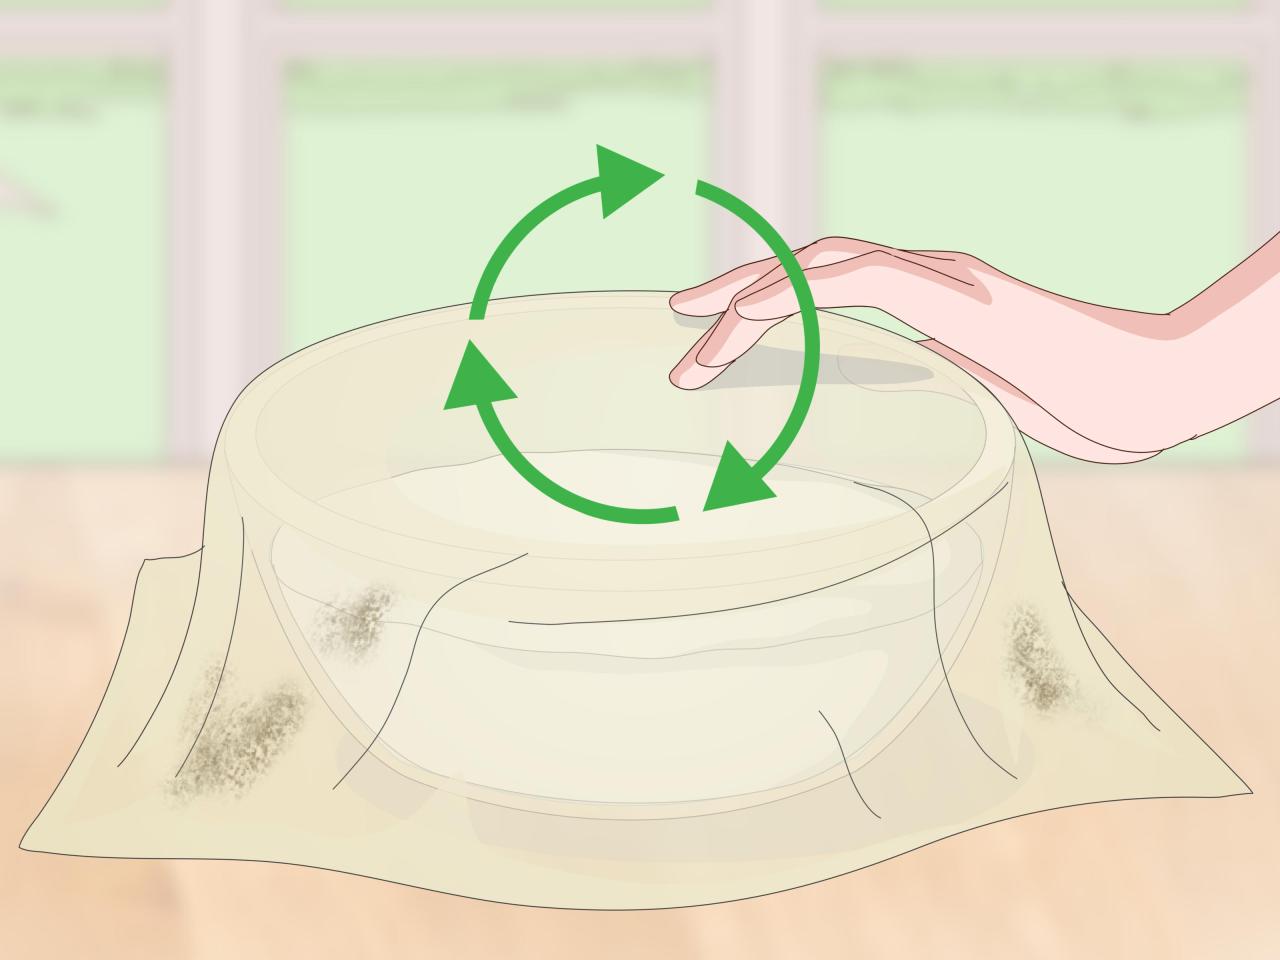
Best Practices for Sanitizing a Cheese Cave or Aging Room
Cheese caves or aging rooms provide the ideal environment for cheese ripening. However, they also provide an environment that supports the growth of molds and bacteria. Effective sanitation is crucial for controlling these organisms and producing high-quality cheese.
- Temperature and Humidity Control: Maintaining the correct temperature and humidity is essential for both cheese aging and sanitation. A temperature range of 45-55°F (7-13°C) and a humidity level of 75-95% are generally recommended. These conditions can also affect the growth of undesirable molds and bacteria. Monitoring and adjusting these parameters are key to maintaining the desired conditions and reducing the potential for contamination.
- Surface Cleaning: Regularly clean all surfaces, including walls, shelves, and floors. Use a food-grade cleaner and sanitizer. The frequency of cleaning depends on the volume of cheese being aged and the potential for mold growth.
- Air Circulation and Filtration: Proper air circulation is important for preventing mold and bacteria growth. Use fans to circulate air and consider installing air filtration systems, such as HEPA filters, to remove airborne contaminants.
- Mold Management: Monitor the cheese cave for unwanted mold growth. Identify the type of mold and address the source of the problem. This might involve adjusting temperature or humidity levels, improving air circulation, or cleaning surfaces more frequently. Some cheese caves use UV light systems to control mold growth.
- Shelf Sanitation: Regularly clean and sanitize cheese shelves. Wooden shelves, which are common, can harbor mold and bacteria. Consider using a food-grade sealant on wooden shelves to make them easier to clean. Stainless steel or plastic shelves are easier to sanitize.
- Cheese Handling Practices: Handle cheese with clean hands and sanitized tools. Avoid cross-contamination by using separate tools for different cheeses. Properly wrap and store cheese to prevent unwanted mold growth.
- Record Keeping: Maintain detailed records of sanitation procedures, including cleaning schedules, sanitizer concentrations, and any corrective actions taken. This documentation is important for maintaining a safe and consistent aging environment.
Testing and Monitoring Sanitization Effectiveness
Regularly testing and monitoring your sanitization practices is crucial for ensuring the safety and quality of your cheese. This process allows you to verify that your sanitization procedures are effective in eliminating harmful microorganisms, preventing spoilage, and maintaining consistent product quality. It also helps you identify potential problems and make necessary adjustments to your sanitation protocols.
Methods for Testing Sanitization Effectiveness
Several methods can be used to assess the effectiveness of your sanitization procedures. These methods range from simple, readily available options to more sophisticated laboratory techniques.
- Using Sanitization Test Strips: Sanitization test strips are a convenient and cost-effective way to quickly check the concentration of your sanitizer solution. These strips are typically designed for specific sanitizers, such as chlorine or quaternary ammonium compounds (quats). They change color when exposed to the sanitizer, indicating the concentration level.
To use these strips, you simply dip the strip into your sanitizer solution and compare the resulting color to a color chart provided by the manufacturer.
This chart indicates whether the sanitizer concentration is within the recommended range for effective sanitization. If the concentration is too low, the sanitizer may not be effective; if it is too high, it could leave residue or damage equipment.
- Using Culture Plates (Swab Tests): Culture plates are a more thorough method for testing the effectiveness of sanitization. These plates contain a growth medium that supports the growth of microorganisms. After sanitization, you can swab the surface of your equipment and transfer the sample to the culture plate.
The culture plate is then incubated at a specific temperature for a set period, allowing any surviving microorganisms to multiply.
After incubation, you can observe the plate for the presence of colonies, which indicate the level of microbial contamination. The number of colonies can give you an estimate of the effectiveness of your sanitization procedures.
The image below shows a petri dish with a growth medium, inoculated with a sample from a sanitized surface. After incubation, bacterial colonies are visible as small, distinct spots. The number of these colonies indicates the effectiveness of the sanitization process. A high number of colonies suggests that the sanitization process may not be adequate, while a low or absent number of colonies indicates successful sanitization.
- Using ATP Testing: ATP (adenosine triphosphate) testing is a rapid method for assessing the overall cleanliness of a surface. ATP is a molecule found in all living cells, including bacteria, yeast, and mold.
ATP testing devices measure the amount of ATP present on a surface. The surface is swabbed, and the swab is inserted into a testing device that measures the light emitted by the ATP.
A higher reading indicates more ATP and, therefore, a higher level of organic matter and potential microbial contamination. ATP testing is a useful tool for quickly verifying the cleanliness of surfaces before and after sanitization. For instance, a reading of less than 10 Relative Light Units (RLU) is generally considered acceptable for sanitized food-contact surfaces.
Interpreting Sanitization Test Results
Understanding how to interpret the results of your sanitization tests is essential for taking appropriate action.
- Interpreting Test Strip Results: When using test strips, it’s crucial to follow the manufacturer’s instructions and compare the color change on the strip to the provided chart.
If the test strip indicates that the sanitizer concentration is within the recommended range, your sanitizer solution is likely effective. If the concentration is too low, you may need to add more sanitizer to the solution or prepare a fresh batch.
If the concentration is too high, dilute the solution with water.
- Interpreting Culture Plate Results: Culture plate results provide a more detailed assessment of microbial contamination. The number of colonies present on the plate indicates the level of contamination.
A plate with no colonies or only a few isolated colonies suggests that the sanitization process was successful. A plate with a moderate number of colonies may indicate that the sanitization process needs improvement. A plate with a high number of colonies suggests that the sanitization process was ineffective and that you should review your procedures.
- Troubleshooting Potential Issues: If your tests reveal problems, there are several potential causes to investigate.
These include:
- Improper Sanitizer Concentration: Ensure you are using the correct amount of sanitizer.
- Insufficient Contact Time: Make sure the sanitizer is in contact with the equipment for the recommended duration.
- Inadequate Cleaning: Dirty surfaces can harbor microorganisms that the sanitizer cannot eliminate. Ensure all equipment is thoroughly cleaned before sanitizing.
- Equipment Design: Some equipment designs may be difficult to sanitize effectively.
- Water Quality: The quality of your water can impact the effectiveness of your sanitizer.
Maintaining a Sanitation Log for Troubleshooting and Quality Control
Maintaining a detailed sanitation log is a best practice for ensuring consistent quality and troubleshooting any problems that may arise. This log serves as a record of your sanitation procedures and the results of your testing.
- Elements of a Sanitation Log: Your sanitation log should include the following information:
- Date and Time: When the sanitization procedure was performed.
- Equipment Sanitized: A list of the specific equipment sanitized.
- Sanitizer Used: The type of sanitizer and its concentration.
- Cleaning Procedures: The cleaning methods used before sanitization.
- Contact Time: The duration of sanitizer contact.
- Test Results: The results of any sanitization tests (e.g., test strip readings, culture plate results).
- Personnel: The name of the person performing the sanitization.
- Corrective Actions: Any actions taken to address problems (e.g., adjusting sanitizer concentration, re-sanitizing equipment).
- Using the Log for Troubleshooting: The sanitation log is a valuable tool for identifying the source of any problems.
For example, if you notice a pattern of consistently poor test results on a specific piece of equipment, you can review your log to see if there are any common factors, such as insufficient cleaning, improper sanitizer concentration, or inadequate contact time. This information can help you pinpoint the root cause of the problem and take corrective action.
- Using the Log for Quality Control: The sanitation log also serves as a quality control tool.
By reviewing your log regularly, you can monitor your sanitation practices and ensure that they are consistently effective. This can help you maintain a high level of product quality and minimize the risk of contamination. The log can also be used to demonstrate compliance with regulatory requirements or industry standards.
Troubleshooting Common Sanitization Problems

Even with the best intentions and meticulous procedures, sanitization can sometimes present challenges. Understanding and addressing these common issues is crucial for maintaining the safety and quality of your cheesemaking endeavors. This section will delve into the most frequently encountered problems and provide practical solutions to ensure effective sanitization.
Inadequate Contact Time
Contact time is the duration a sanitizer must remain in contact with a surface to effectively kill microorganisms. Insufficient contact time is a frequent culprit in sanitization failures.
- Problem: Sanitizer is rinsed away too quickly, or equipment is used before the recommended contact time has elapsed.
- Solution: Carefully review the manufacturer’s instructions for your chosen sanitizer. These instructions specify the required contact time, which can vary depending on the sanitizer and the type of surface being sanitized. Set a timer to ensure the sanitizer remains in contact for the correct duration. If using a spray bottle, ensure complete coverage and sufficient dwell time. Consider using a visual timer or a checklist to stay on track.
- Example: A common sanitizer, sodium hypochlorite (bleach), often requires a contact time of at least 2 minutes for effective sanitization. Rinsing equipment after only 30 seconds will likely leave microorganisms alive.
Improper Sanitizer Concentration
The effectiveness of a sanitizer hinges on using the correct concentration. Too weak, and it won’t kill microorganisms; too strong, and it could leave residues or damage equipment.
- Problem: Sanitizer is diluted incorrectly, or the concentration drifts over time.
- Solution: Always measure sanitizer accurately using calibrated measuring tools. Follow the manufacturer’s instructions precisely for dilution ratios. Regularly test the sanitizer solution using test strips or a titration kit, especially for solutions that are used repeatedly. Replace sanitizer solutions frequently, especially if they become cloudy or contaminated.
- Example: A common recommendation for a bleach solution used for sanitizing cheesemaking equipment is 1 tablespoon of unscented household bleach per gallon of water. Using more bleach than this could leave potentially harmful residues, while using less might not be effective.
Water Quality Issues
Water quality significantly impacts sanitizer effectiveness. Hard water, high in minerals, can neutralize sanitizers, reducing their potency.
- Problem: Using hard water or water containing organic matter can interfere with sanitizer performance.
- Solution: Use potable water, free from visible contaminants. If you suspect hard water, consider using distilled or deionized water for sanitizing solutions. If your tap water is hard, you may need to soften it or filter it before using it in your sanitizing solutions.
- Example: Chlorine-based sanitizers are less effective in hard water. The minerals in the water can react with the chlorine, reducing its ability to kill microorganisms.
Biofilm Formation
Biofilms are complex communities of microorganisms that adhere to surfaces. They can be highly resistant to sanitizers.
- Problem: Biofilms develop on equipment surfaces, providing a protective environment for microorganisms.
- Solution: Implement a rigorous cleaning protocol to remove biofilms before sanitization. Use a suitable cleaner and follow the manufacturer’s instructions carefully. Consider using enzymatic cleaners to break down biofilms. Regular inspection of equipment surfaces for signs of biofilm formation is crucial.
- Example: Dairy equipment is particularly susceptible to biofilm formation. Biofilms can harbor pathogens such as
-Listeria monocytogenes*.
Sanitizer Resistance
Over time, microorganisms can develop resistance to certain sanitizers, making them less effective.
- Problem: Some microorganisms develop resistance to sanitizers through genetic adaptation.
- Solution: Rotate sanitizers periodically. Do not rely solely on one type of sanitizer. Use sanitizers with different modes of action. Ensure proper cleaning and sanitization practices. Regularly test your sanitization effectiveness.
- Example: The overuse of quaternary ammonium compounds (quats) can sometimes lead to resistance in certain bacteria. Rotating sanitizers to include chlorine-based or peracetic acid-based sanitizers can help prevent this.
Equipment Design and Condition
The design and condition of cheesemaking equipment can impact sanitization effectiveness. Equipment with cracks, crevices, or hard-to-reach areas can harbor microorganisms.
- Problem: Equipment design makes sanitization difficult or impossible, or the equipment is damaged.
- Solution: Choose equipment designed for easy cleaning and sanitization, with smooth, non-porous surfaces. Inspect equipment regularly for damage, such as cracks or scratches, and replace damaged items. Disassemble equipment as much as possible for thorough cleaning and sanitization.
- Example: A cheesemaking vat with numerous rivets or poorly sealed seams is harder to sanitize than a vat with a smooth, welded construction.
Post-Sanitization Handling and Storage
After all the effort invested in sanitizing your cheesemaking equipment, it’s crucial to handle and store it correctly to prevent recontamination. This final step ensures your equipment remains free from unwanted microorganisms, preserving the quality and safety of your cheese. Careful handling and storage are just as important as the sanitization process itself.
Preventing Recontamination
Once equipment is sanitized, it’s vulnerable to recontamination from various sources. Touching sanitized surfaces with unsanitized hands, exposing equipment to airborne contaminants, or storing equipment in an unclean environment can all introduce microorganisms. To maintain the cleanliness achieved through sanitization, adopt these best practices.
Best Practices for Storage
Proper storage is essential for preserving the sanitation of your equipment. This involves selecting appropriate storage containers, ensuring adequate ventilation, and maintaining a clean storage environment.
- Storage Containers: Use clean, food-grade containers, preferably made of plastic or stainless steel. These containers should be dedicated solely for storing sanitized equipment. Avoid using containers that have previously held non-food items or are difficult to clean.
- Ventilation: Store equipment in a well-ventilated area. This helps to prevent the buildup of moisture, which can promote microbial growth. If using enclosed containers, ensure they are properly vented or allow for air circulation.
- Environmental Cleanliness: The storage area itself should be clean and free from dust, dirt, and potential sources of contamination. Regularly clean the storage area to prevent the accumulation of microorganisms. Avoid storing equipment near areas where cross-contamination could occur, such as areas where raw materials are handled.
Dos and Don’ts for Post-Sanitization Handling and Storage
Following these guidelines will help you maintain the sanitation of your cheesemaking equipment and prevent the introduction of unwanted microorganisms.
- Do:
- Wash and sanitize your hands thoroughly before handling sanitized equipment.
- Use clean gloves when handling equipment, especially if direct contact with food contact surfaces is required.
- Store equipment in clean, covered containers or in a designated, clean area.
- Allow equipment to air dry completely before storage.
- Inspect equipment regularly for any signs of contamination or damage.
- Don’t:
- Touch sanitized surfaces with bare hands, especially if your hands are not sanitized.
- Store equipment in areas where it could be exposed to dust, dirt, or other contaminants.
- Stack wet equipment, as this can promote microbial growth.
- Use the same containers for storing sanitized and unsanitized equipment.
- Neglect regular cleaning and sanitization of the storage area.
Creating a Sanitization Schedule
Sanitization schedules are essential for consistent and effective hygiene in cheesemaking, minimizing the risk of contamination and ensuring product safety. Implementing a well-defined schedule helps maintain a clean environment, reduces the likelihood of spoilage, and supports compliance with food safety regulations. These schedules need to be tailored to the scale of the operation, from a home kitchen to a commercial facility, and to the specific cheeses being produced.Understanding the differences between a home cheesemaking setup and a commercial facility is crucial in developing effective sanitization schedules.
Home cheesemakers often have more flexibility but must still adhere to proper procedures. Commercial facilities face stricter regulations and require more comprehensive protocols.
Sanitization Schedule for Home Cheesemakers
A home cheesemaking schedule focuses on simplicity and consistency. The frequency of sanitization should be based on the type of equipment, the frequency of cheesemaking, and the specific cheeses being made.
- Daily Sanitization:
- Equipment: All equipment that comes into contact with milk or cheese, such as the cheese pot, stirring utensils, molds, and draining mats, should be sanitized after each use.
- Surface Areas: Countertops, cutting boards, and any other surfaces used for cheesemaking should be sanitized before and after each cheesemaking session.
- Weekly Sanitization:
- Storage Containers: Cheese storage containers (e.g., plastic containers, cheesecloth-lined baskets) should be sanitized before storing cheese.
- Refrigerators: The refrigerator used for cheesemaking should be cleaned and sanitized, paying close attention to any spills or areas where cheese might have come into contact.
- As Needed Sanitization:
- Equipment Deep Cleaning: Equipment that is not used daily, or that has been used to make a specific cheese (e.g., a brie mold), should be sanitized immediately after use.
- Spills: Any spills of milk or whey should be cleaned and sanitized immediately.
For various cheeses, here’s how the sanitization requirements may differ:
- Fresh Cheeses (e.g., Ricotta, Cottage Cheese): These cheeses are consumed relatively quickly, so frequent sanitization is critical. Equipment used in their production must be sanitized after each use.
- Aged Cheeses (e.g., Cheddar, Parmesan): While still requiring rigorous sanitization, the aging process itself can offer some protection. However, molds and aging rooms require special attention to prevent cross-contamination.
- Soft-Ripened Cheeses (e.g., Brie, Camembert): These cheeses are highly susceptible to contamination. All equipment, molds, and the aging environment must be meticulously sanitized.
Sanitization Schedule for Commercial Cheesemaking Facilities
Commercial facilities require a more complex and regulated sanitization schedule, adhering to local and national food safety regulations. This schedule must be documented, and records of sanitization activities must be maintained.
- Daily Sanitization:
- Production Equipment: All equipment used in the production process, including vats, agitators, cheese presses, and packaging equipment, must be sanitized after each production run.
- Food Contact Surfaces: All food contact surfaces, such as countertops, cutting boards, and work tables, must be sanitized at the end of each shift and potentially between different cheese types.
- Floors and Drains: Floors and drains in the production area must be cleaned and sanitized at the end of each shift to prevent the buildup of bacteria and mold.
- Weekly Sanitization:
- Equipment Disassembly and Cleaning: Equipment that can be disassembled (e.g., pumps, valves) should be taken apart and thoroughly cleaned and sanitized on a weekly basis.
- Aging Rooms: Aging rooms, where cheese is stored, must be cleaned and sanitized to control mold growth and prevent cross-contamination. The frequency of sanitization can vary depending on the specific cheeses being aged.
- Monthly Sanitization:
- Equipment Calibration and Inspection: Equipment should be calibrated and inspected monthly to ensure it is functioning correctly and can be effectively sanitized.
- Deep Cleaning of Production Area: A more thorough cleaning and sanitization of the entire production area, including walls, ceilings, and storage areas, should be conducted.
- As Needed Sanitization:
- Spills and Contamination Events: Any spills of milk or whey, or any other contamination events, must be cleaned and sanitized immediately.
- Equipment Repairs: Any equipment that has been repaired or modified must be thoroughly cleaned and sanitized before being put back into service.
Here’s how sanitization requirements vary based on cheese type:
- Fresh Cheeses (e.g., Mozzarella, Feta): These cheeses require the highest level of sanitation due to their short shelf life and high moisture content. Equipment must be sanitized after each use.
- Semi-Hard Cheeses (e.g., Gouda, Havarti): These cheeses require rigorous sanitation, with a focus on preventing the growth of undesirable bacteria and mold. Equipment should be thoroughly cleaned and sanitized daily.
- Hard Cheeses (e.g., Cheddar, Parmesan): These cheeses, while more resistant to spoilage, still require strict sanitation protocols. The aging rooms and cheese handling equipment need careful attention.
- Bloomy Rind Cheeses (e.g., Brie, Camembert): These cheeses are particularly susceptible to contamination, necessitating meticulous sanitization of all equipment, molds, and aging environments.
- Washed Rind Cheeses (e.g., Limburger, Taleggio): These cheeses require strict sanitation, with a focus on controlling the growth of undesirable bacteria and mold. Equipment should be thoroughly cleaned and sanitized daily.
Commercial facilities often use automated cleaning and sanitizing systems, such as Clean-in-Place (CIP) systems, to ensure consistent and thorough sanitization. They also use specialized equipment and cleaning agents designed for large-scale operations. Documentation is critical in a commercial setting, with detailed records of cleaning and sanitization activities required for regulatory compliance.
Outcome Summary
In summary, achieving cheese perfection hinges on the meticulous practice of sanitization. From understanding the nuances of cleaning and sanitizing to mastering the art of post-sanitization handling and storage, this guide equips you with the knowledge to elevate your cheesemaking game. By implementing the techniques and schedules Artikeld, you can consistently produce high-quality, safe, and flavorful cheeses. So, go forth, sanitize with confidence, and enjoy the fruits (and cheeses!) of your labor!